Sometime ago I wrote, “Well, isn’t Santa great? Knowing my passion for holography, last Christmas he decided it was about time I stopped feeling miserable about my poor progress in the matter and granted me a Litiholo Hologram kit“. This year he has been even nicer and has provided me with the new Full Color Holography Kit:

Given my great experience with the original kit, I backed this project in Kickstarter. As a seasoned kickstarter backer, I’ve seen projects some delay forever and fail to deliver and others success and provide a great product (for example, openbeam). You never know what to expect when you back a project. Paul from Litiholo has proceeded admirably, with a reasonable delay, and has delivered a product really worth considering, though not lacking some minor flaws. I know some backers are still waiting for their kits and they think shipping is going too slow… if this helps them, delivery time is in the average for successful projects in kickstarter, and more importantly, the kit is worth the wait!, and they really want to get a fully tested and funcional kit.
I have uploaded tons of photos of my first tests in my flickr page, with comments and details of the kit contents, set-up and the like… If you want more information than what is provided here, refer to those photos and their comments.
This is what you get with the kit: a red diode laser, a blue diode laser, a green dpss laser, some plastic pieces that snap together to create a single-beam set-up for reflection holograms (and hopefully transmission), the holographic plates where the holograms will be recorded, and an additional special plate: a ‘holographic optic element’ (HOE) to be used to combine the three laser beams into a single one.
First I tried the default set-up for a single-beam reflection hologram, using some colorful bottle caps that are included in the kit, just following the instructions provided. The set-up is quick and easy to do, but a little tricky to fine tune when trying to align the three lasers. In the end this is what I got (and a video), my first full-color reflection hologram!!!!!:

This hologram is pretty sharp, considering that I did not use any type of vibration isolation, just made it on a regular sturdy desk table.
I’ve made more attempts, some successful, some less, which are discussed in my flickr albums. Compared to other’s reporting extremely bright ones, I seem to have a problem with my green laser, but it works no matter what; this is a simple transmission I did to test the green laser and is one of the sharpest (maybe not brightest) holograms I have ever made:

On a more technical note, I miss some more information about the lasers specs and the film properties. I can understand commercial reasons not to disclose much info, but… (yes, this paragraph is verbatim from the previous post, but the objection still stands!)
The clever way to mix the colors into a single unidirectional beam deserves some notice. The use of the ‘combiner’ HOE is really interesting, and a nice way to solve a problem without the need for mirrors or expensive beam combiners. As I said, getting it directions right is a little tricky, but the solution works fine. This approach, however, limits the possible geometries for recording holograms to those directly devised originally for the kit, but I am sure some creativity can help here…
What I loved:
- I got a nice reflection hologram at the very first try.
- No processing involved makes using this film quick and easy
- It definitely works!
- Color! Hey, you get three lasers!
- Great for schools, demonstrations or plain fun: you need know nothing about holography to make it work.
- I think it makes a great tool for amateurs like me also, to quickly test more complex set-ups, because it removes two variables from the equation: exposure time and processing.
- The kit only allows a limited set of configurations.
- The beam profiles for the three lasers cannot cover the full plate.
- The kit material is fragile, be careful not to drop specially the laser holders… maybe thicker material should have been used.
In conclusion, if you know the original kit, this one keeps the same approach, only in colors… if you liked it, you should love this. If you didn’t, well… you could give it a chance to get some color! If you do not know the original kit, this one makes a great choice, since it actually allows you to do the same it did, and then some.
I really like the kit, and if you are curious about holograms (real holograms, no false hype here) I wholeheartedly recommend it, even though some tweaking in the lasers profiles and plastic material used could improve it. After all this is a beginners kit, and that should be kept in mind, and you get panchromatic plates and three lasers!, you can use this material to try more adventurous set-ups once you master what the kit has to offer.
Now, if only they got a distributor overseas, so we need not pay terrible shipping plus customs for new film…
Keep in mind that when you read this the kit might not yet be widely available… just keep checking litiholo’s site.
Beam me up, Scotty!… or Kinect meets Makerbot.
So, when you do this stuff I do (whatever is it, now they call it being a ‘maker’) you think you are alone in this part of the world: you can read what other people do on the internet, most in the USA and Australia, some in Europe… but they never seem to be here in Spain. You wish Scotty could beam you across the Atlantic, or, if not you, at least some parts you buy for your gadgets, without paying for shipment, customs and having to wait.
")
Final printed model (1)
And then you come across an announcement for a Kinect + Makerbot workshop and suddenly, when you meet with about other 15 people with similar interests, you realize you are not as weird as you thought. But I will skip that for another day. Today I will focus on the contents of the workshop. And see how all the Star Trek ‘Scotty beam me up!’ thing is coming alive.
This is what we did:
- First setup the computer (OSX Lion in this case) to work with the Kinect, using the OpenKinect and OpenNI drivers and libraries. We used Processing and openFrameworks to run our examples. I had never used them, but they seem not to be too complex… In particular Processing should be very familiar to anyone using the Arduino IDE.
- Then we used KinecttoSTL, a openFrameworks program to capture a 3D image from the Kinect. Something like this:

KINECTtoSTL
- The 3D model was exported to Meshlab and Blender for face reduction and edge softening and final manipulation.
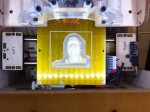
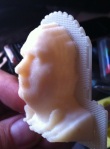
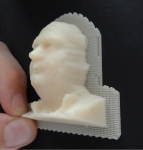
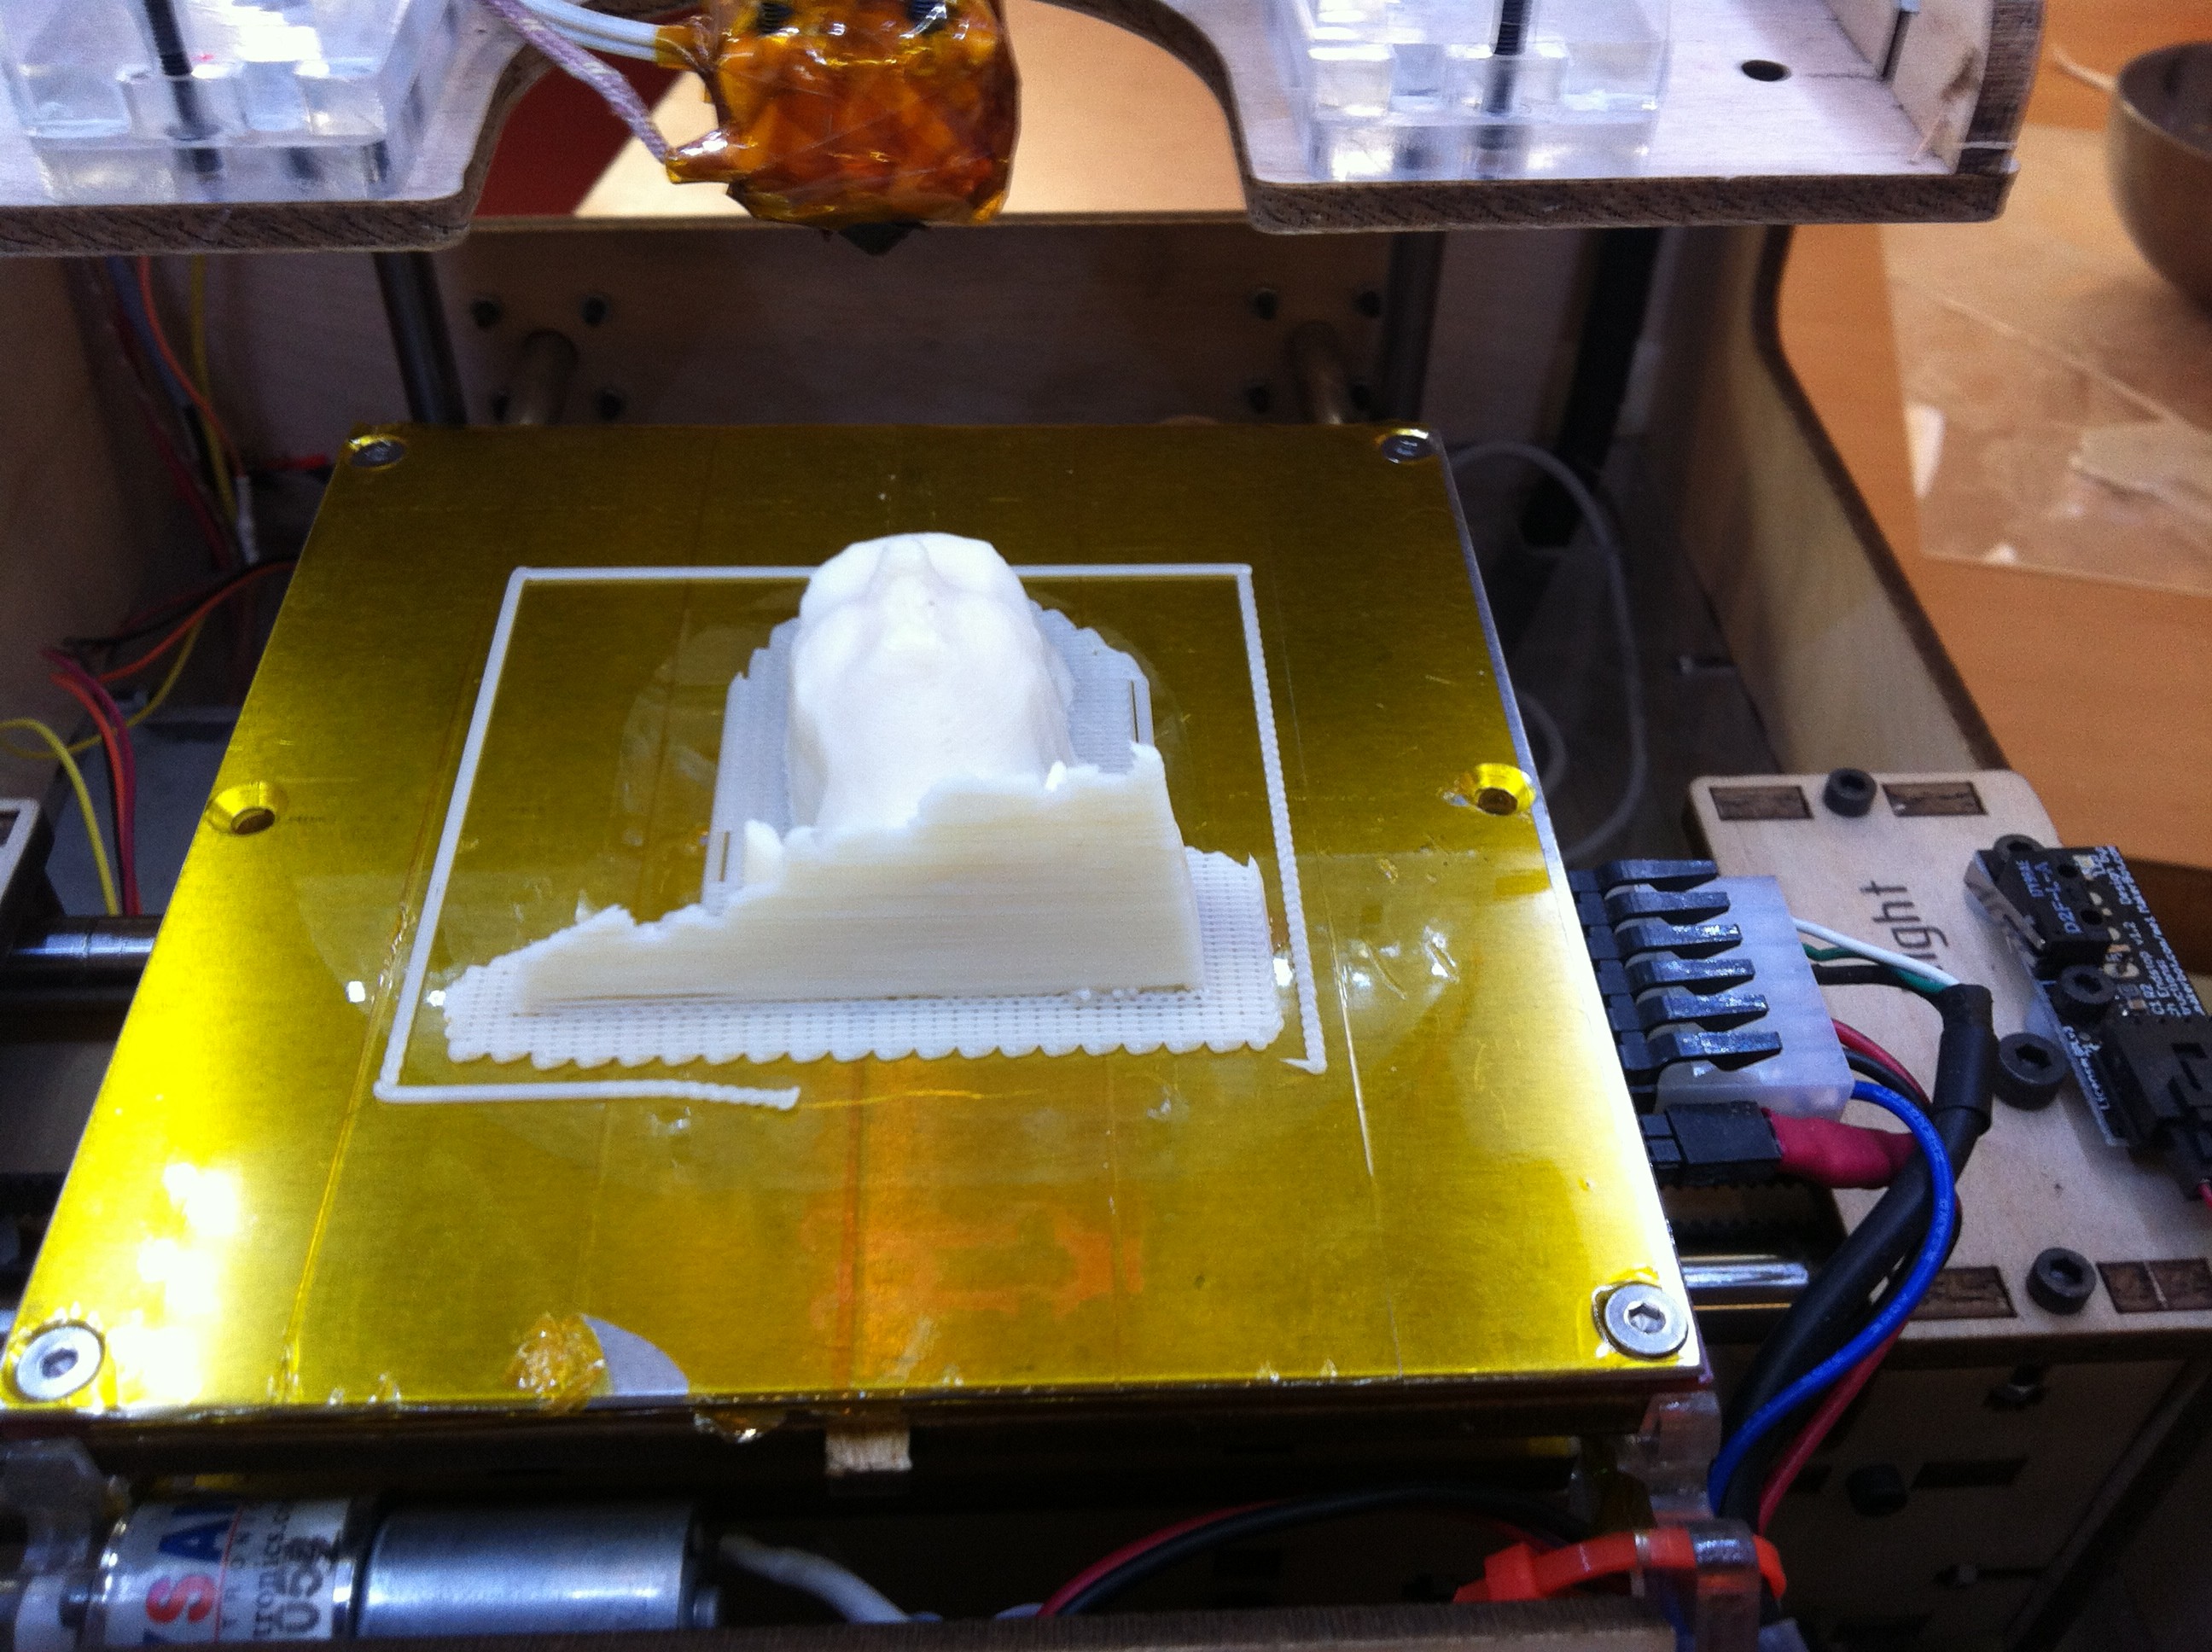
- The exported model was printed in one of the two makerbots available for the workshop. This is how the final mesh and printed bust looks like:
-

- KINECTtoSTL
-

- Scanned mesh in Meshlab (1)
-
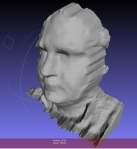
- Scanned mesh in Meshlab (2)
-
- Printed model from above
-

- Printed model from front
-
- Final printed 3D result
-
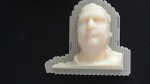
- Final printed model (1)
-
- Final printed model (2)
-

In conclusion, no matter how many videos you may have seen of people doing great things with the Kinect, it really impresses how powerful it is, and how many tools you can find on the net to take advantage of it. The last one being the Reconstructme code, released just one day after the workshop.
The workshop was held by the nice people at Medialab-Prado in Madrid. I had always dealt with the Medialab with some distance, since I did not seem to be able to make out what it really was. I knew it existed, but I was not sure what they did, and was a little scared of going in and ask… It definitely is not a fablab (yet) or a hackerspace. Along with the makers, there are artists, there, and it seems to me that it is more focused in art than I am. And then this workshop appeared, and it seemed to me like the perfect chance to go there.
The workshop was hosted by organized by the Openfab group (this seems is a pretty self-explanatory name to me). Our teachers and hosts were a mixture of artists, programmers and makers, namely: Chris Sugrue, Gorka Cortázar, Bernat Cuni and Dani, the Master of the Makerbot.
In all, it was great to see how easy the open community has granted everyone access to the power the Kinect brings. Our trainers provided us with direct explanations on how to do everything, and were kind and responsive to our help requests. They also provided lots of links with detailed info and step-by-step instructions for setting up the libraries, managing the 3D models under free tools like Meshlab and Blender, and the printing them with the Makerbot. As you can see, all is invested with the ‘OpenX’ (open source, open hardware) in mind, which is a landmark of the Medialab philosophy.
After this, I cannot wait for my Printrbot to arrive, and hopefully I will meet with the people at the Openfab group to build it and get to know more great people like those I met at the workshop.
Poetry in Motion… or, Mom, look what I did!
“Poets say science takes away from the beauty of the stars – mere globs of gas atoms. I too can see the stars on a desert night, and feel them. But do I see less or more? The vastness of the heavens stretches my imagination – stuck on this carousel my little eye can catch one – million – year – old light. A vast pattern – of which I am a part… What is the pattern, or the meaning, or the why? It does not do harm to the mystery to know a little about it. For far more marvelous is the truth than any artists of the past imagined it. Why do the poets of the present not speak of it? What men are poets who can speak of Jupiter if he were a man, but if he is an immense spinning sphere of methane and ammonia must be silent?”
― Richard P. Feynman
- Car Hologram using Litiholo Holography kit (1)
- Car Hologram using Litiholo Holography kit (2, slower camera motion)
- Smurf figurine reflection hologram on litiholo film.
As Feynman says, this is another kind of poetry: the simplicity of the principles behind these, the details to make it work, and the esthetics, all come together. For details on the holograms, refer to this post.
Litiholo or What’s in a KISS?
Well, isn’t Santa great? Knowing my passion for holography, last Christmas he decided it was about time I stopped feeling miserable about my poor progress in the matter and granted me a Litiholo Hologram kit:
I have to admit that I had been more than sceptic about Litiholo product since I first heard about it. It seemed too easy to be of any use. The kit always seemed nice and well thought, but those plates requiring no processing… no way!!!! However, I’ve been hitting the same wall for a few years now in my holograms attempts, so it seemed like time for a new approach
What all this summarizes into, is that, out of frustration, I decided to embrace the KISS principle and give the holokit a chance. Oh, my!
I will not delve into the contents of the kit, they are pretty clear in their site: a <5 mW led laser, some plastic pieces that snap together to create a simple single-beam bypass set-up for transmission holograms, and the plates. The special touch is in the plates (they call them “Instant hologram” film) that require no chemical, mechanical or heat processing at all. Just expose and that’s it.
DISCLAIMER: The photos of the holograms are not great. Sorry, this is the best I and my friend Pablo could get. You know, holograms do not like to be photographed. They think (correctly) that photos steal their souls. BTW, thanks Pablo for some of the photos. We will keep trying and I will surely post better photos.
Some really important info before I go on: I made these holograms on the floor, no isolation table or the like. It is just the floor (wood covered) in a third floor apartment in a five floors building in a rather quite environment.
First I tried the default set-up for a single-beam bypass transmission, with the red metal car provided, just following the instructions included. Since Litiholo claims that you cannot burn the film and that you should start at 5 minutes exposure and increase it if you did not get results, I decided I’d just go for a 15 minutes exposure on the first try. This is the hologram I got. Not perfect, but good enough for what I was getting so far with other approaches!
Some photos from different angles:
 - Front view")
Transmission hologram on litiholo plate (15' exposure) - Front view
")
Transmission hologram on litiholo plate (15' exposure)
Then I decided I wanted to try a single-beam reflection hologram, so I went to my toys drawer and got out a small smurf figurine. Yes, I know it is blue, this means little reflection in the red wavelength and longer exposition, but hey, what is life worth without some risk? I placed the figurine just behind the plate and exposed for 25 minutes. Et voilà!
This is the figurine models I used and the set-up:

")
Litiholo reflection set-up (detail)
This first photo shows the hologram lit with the laser provided in the kit. Though the photo does not show it, the hologram has great contrast and a second figurine (Papa smurf) is viewable on the back to the right. Again, notice that the figurine is blue in the face and hands, but it comes out pretty well.

- Smurf figurine reflection hologram on litiholo film

Two more versions of this photo, in black and white and enhanced contrast to help you see the subject better.
")
Smurf figurine reflection hologram on litiholo film (black and white)

Smurf figurine reflection hologram on litiholo film (high contrast)
A final photo showing the hologram under white light. Some bad color dispersion in this one. I still have to try it out in the sun or with a nice spot light. You can also see a nasty blue streak on the top that looks to me like undesired movement during exposure.

Smurf figurine reflection hologram (litiholo film) under white light
Let me add a quick note on the plate ‘components’: This last photo shows that there is a plastic film attached to the glass plate. I asked Litiholo about this, and what we have here is a coated film (plastic) mounted on a glass, so that the ’emulsion’ is sandwiched between the plastic and the glass. So, when in the instructions they say ‘do not remove the plastic’, they mean it! Otherwise you’d be exposing a plain piece of glass (I did, I thought the plastic was a simple protection, not the actual film).
On a more technical note, I miss some more information about the film properties. I can understand commercial reasons not to disclose much info, but… I need to try with other lasers. Also, someone at the holoforum mentioned that the film is actually panchromatic, but I have no confirmation on this.
What I loved:
- I got a fairly viewable transmission hologram at the very first try.
- I got a fairly viewable reflection hologram at the very first try.
- No processing involved makes using this film quick and easy
Pros:
- It definitely works!
- Great for schools, demonstrations or plain fun: you need know nothing about holography to make it work.
- I think it makes a great tool for amateurs like me also, to quickly test more complex set-ups, because it removes two variables from the equation: exposure time and processing.
- The film is rather tolerant with light around the set-up, I did not have total darkness in my tests, but some light coming in thorugh the door.
Cons:
- The kit only allows a single set-up (two if you know what a reflection hologram is).
- The lighting angle is not the best for replaying, an overhead lighting would be more natural.
- No chemical processing means no control on final hologram color, but this is an advanced skill in any case
In conclusion, all my initial doubts were washed away as soon as my first hologram came out right! It seems a perfect set for classrooms and curious people, and the film offers lots of posibilities for people trying to go deeper into the matter like myself. It has been a rewarding experience to try the litiholo kit, though it was so easy and simple that I even had a guilty feeling of having cheated. But I could not help but order some more film… which, by the way, I’d love to see in larger sizes.
Regarding my own previous experience on holography, the use of the kit has shown me that I’ve been struggling with some very bad Slavich plates and thinking I was having more problems than those I really had. I always thought I had stability issues (which I have), problems with the chemistry (which I have), problems with exposition times (which I have) but never thought about the plates themselves. They could not be that bad. But the more I talked to people in the knowledge, the more I began to realize that the plates might be the problem. So I made different moves to address this issue, scouting for other films, one of which has been litiholo, but that is another story. So, actually removing the exposition time and processing times from the list of possible sources of error, and getting good holograms with these plates has helped me a lot to sort out where my problems came from. Will I keep using silver halide film? Definitely. Will I keep using litiholo film? Yes indeed.
Summertime… or So much to do, So little time
So, August is coming… this means lots of free time to tinker and play! And since Christmas I have gathered so many projects I am interested in working on, that, guess what, Summer will pass and I will have not progressed in any of them.
So, let me recap what my projects are right now:
- Learning to use arduino, a wonderful programmable board to sense and control the world around you. If, like me you know absolutely nothing about electronics, this is a great place to start.
- 3D scanning using DAVID laserscanner. Not only the basic manual thing. I want to use the arduino thingy to automate the scan process following the suggestions and good advice of the nice people at the forum. Thanks Walter.
- Back to basis on holography. I have “managed” to get a nice concrete slab (yes, yes, I got it from a dumpster on the street) that will help me a lot to solve my stability problems. Also, I still have slavich and Ultimate plates to play with, my new untested red laser… and a green one on its way! My idea is to start from the very basis… and document the whole process. The final aim is to build a holographic printer for stereograms. This will also require building a simple camera rig or dolly to take images to be converted into a stereogram.
- You ever heard about 3D printing? Nice project to tackle if you have a nice 3D scanner, right. Take a look at what people are doing out there: Open3DP, Junior Veloso, and the HiRes 3D printer group. This sure looks like a tempting project to tackle!, doesn’t it?
I said it, so much to do, so little time…

Arduino board
Yep, I also saw “Tron” back in 82…
… and man, was I spoiled!!!!! As a proof, take a look at the following image:

Dust cover & lights
Ok. This is my CNC after my last days with it. I had some MDF boards cut to make a dust and noise cover, with a transparent plastic front… and yes, it works! Noise and dust are reduced to the point of making the CNC usable at home… I needed some light also, and while foraging for parts I came across that nice leds strip, which seemed to me like a good addition to the looks of the machine, but most of all, as a great light source to see anything inside the case.
But I had to do something with the dust, still, cannot let it build up into the case. Here is my first simple approach: a handheld vacuum cleaner within the case (not visible in the photo). It worked for a while, but (i) the vacuum cleaner got clogged quite easily, and (ii) also got terribly hot. Next step will be drilling a hole in the case to get the vacuum tube out to an external (possibly homemade cyclone) extractor. I will also need to add some collecting device (brush, plastic strips…) to the tube holder to help direct the dust into the tube.

Dust collecting
Well, it really looks nice, doesn’t it… But still too slow for my needs… Maybe I should ask Santa for some new motors and leadscrews….
And the winner is…
Just a quick follow-up on my previous post. The original holography forum has been archived and added to Holoforum as an edited read only feature. Ahmet kindly requests that we do not scrape the whole thing… it will be available for download soon. Also I hope to resume my holothings this holidays season…
I have updated the link on the right of this page! Thanks again Ahmet.
When a Door Closes a Window Opens (even if it is holographic)
Just a quick note: after the sudden but not totally unexpected demise of the refence forum in holography, www.holographyforum.org, (see here the explanation of this proccess), a new forum seems to try to get its place, and hopefully will, if egos allow.
The new forum is www.holoforum.org and Ahmet deserves a big THANKS for putting it up. Best luck with this new adventure! At the time some long time contributors to the old forum are registered there.
I also want to thank Colin (Kaminski) for his constant effort over the last few years, first setting up the original Network54 forum, then the holographyforum, then the holowiki… and constantly kindly answer all questions from newcomers, spending lots of time on us.
Here is one of Colin’s holograms from his web site as an homage and thanks…

Mermaid by Colin Kaminski
Where my CNC and this blog both come back to life…
I finally got around to refurbishing my CNC machine and set it to work for real! This is not the place to discuss the project I am working on, but let me say it is what the CNC machine was created for originally… and the machine seems to behave even better than expected.
The modifications were mainly in order to increase speed. So first thing was to support the leadscrews as shown in this photo:

My CNC Refurbished and ready to work!
This allowed me to improve the speed by a small amount by reducing the leadscrew whipping, but it was not enough to make the machine useful for the big tasks ahead! So I asked at the official Rockcliff Forum and got the right answer: just power the motors with higher voltage, and so I did! This has taught me two lessons:
– I traded speed for precission: I got motors with too small a step and leadscrews with too small a pitch for my needs – I should have been more serious about my needs, I just jumped looking for precission while I did not need that much, and gave speed for granted! A coarser set-up (less steps per turn in the motor and a longer pitch in the screw) would have served my needs regarding accuracy and would have granted me much higher speed. At the moment, I have to stick to this set-up, since changing any of those elements would be too expensive. Too bad. Lesson 1: Think about REAL needs first!
– Now, the solution provided in the forum was great, but I should have been able to get there myself… Lesson 2: Try, and keep trying new things!
Now, a short video summarizing in less than 3 minutes the work of two days… still in testing phase but using the real model (driven by Mach 3 demo on Windows XP)…
Where my HTPC comes to life
So, after much pondering and googling and guessing, I got myself my little nice HTPC… I considered the much praised WD-TV gadget, which in fact I had the chance to test and is a nice piece (smooth mkv HD videos play). But even though it has been hacked and extended with custom firmwares that add wifi, torrent and more to it, it seemed not what I was looking for… I think I had just got too used to enjoying XMBC.
So I decided to build a full blown, though tight on budget home theater – PC (my HTPC)This is what I made it from:
- Mainboard: Zotac ION-ITX-A. So, this is a small (mini-ITX factor) board, that includes out of the box an Atom 330 processor, Wifi and external power supply. It is also loaded with an nvidia graphic card of the 9xxx series (I think it is 9600), great for GPU video decompressing, with HDMI out. Detailed specs here
- 4 GB DDR-3 memory
- 1 TB HDD (yes, well, I love it…!)
- Old keyboard, mouse, and MCE remote from an old HP PC.
- Sound via a simple 2.1 system

Regarding the software, it was clear from the very beginning that I would use XBMC. This open source media center is available in many flavors… I tested it in this particular machine under Windows XP and Ubuntu 9.04, and kept both with dual booting.
Under Windows XP everything works fine, except the remote (funny, it is a Microsoft MCE remote and I was not able to run correctly -tries evenghost, and some other pieces of software), and of course, 720p and 1080p videos are jerky at best… why? The XBMC for Windows does not support GPU decoding of movies… yet? (a DirectX port seems to be in the making, but…).
Second try: Ubuntu 9.04 and XBMC following this guide designed for the Asrock 330 PC, based on the same ION architecture. It worked, remote and all in my first try. So it is what I am using now! Great 720p and 1080p performance. I am using the Transparency! skin with custom backgrounds, and all my movies and TV series info and covers automatically scraped by XBMC itself.
Wonderful.
Just a word of caution: this model has external power supply, and no on-board connection for other power supply, so if you find a nice ITX case for your HTPC, you might as well get it without power supply… it will be useless (yes, well, I will try mine for my CNC, so I can get all the electronics in a nice small aluminum case, replacing my current ATX power supply).
